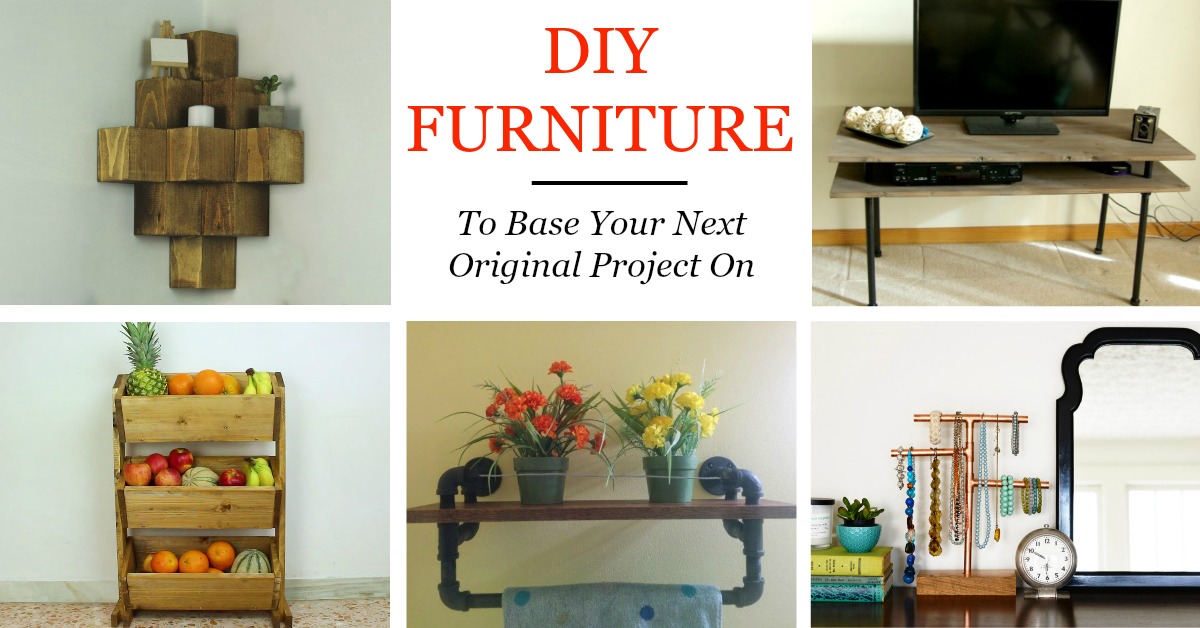
Creative DIY furniture opens a world of possibilities, transforming ordinary spaces into personalized havens. Building your own furniture offers a unique blend of artistic expression and practical functionality, surpassing the limitations of mass-produced pieces. From rustic charm to modern minimalism, the styles achievable through DIY are virtually limitless. Imagine crafting a bespoke coffee table, perfectly tailored to your living room, a process that not only saves money but also instills a deep sense of pride and accomplishment.
This guide delves into the exciting realm of crafting your own furniture, providing comprehensive instructions, design inspiration, and safety guidelines. We’ll cover essential tools and materials, explore various project ideas ranging from beginner-friendly to more advanced techniques, and demonstrate how to upcycle existing pieces to create unique and sustainable furniture solutions. Prepare to unlock your inner craftsman and embark on a rewarding journey of creation.
Introduction to Creative DIY Furniture
The allure of crafting your own furniture lies in the unique blend of creativity, cost-effectiveness, and personal satisfaction it offers. It’s a rewarding process that allows you to express your individual style and create pieces perfectly tailored to your space and needs, going beyond the limitations of mass-produced items. The journey from concept to completion fosters a deep connection with the finished product, transforming a simple piece of furniture into a cherished possession.
DIY furniture presents several advantages over store-bought alternatives. Firstly, it’s significantly more budget-friendly. By sourcing materials yourself and avoiding retail markups, you can achieve substantial savings. Secondly, you gain complete control over the design, materials, and finish, ensuring the final product aligns perfectly with your aesthetic preferences and functional requirements. Finally, the process itself is incredibly satisfying, providing a creative outlet and a sense of accomplishment.
Styles Achievable Through DIY Furniture
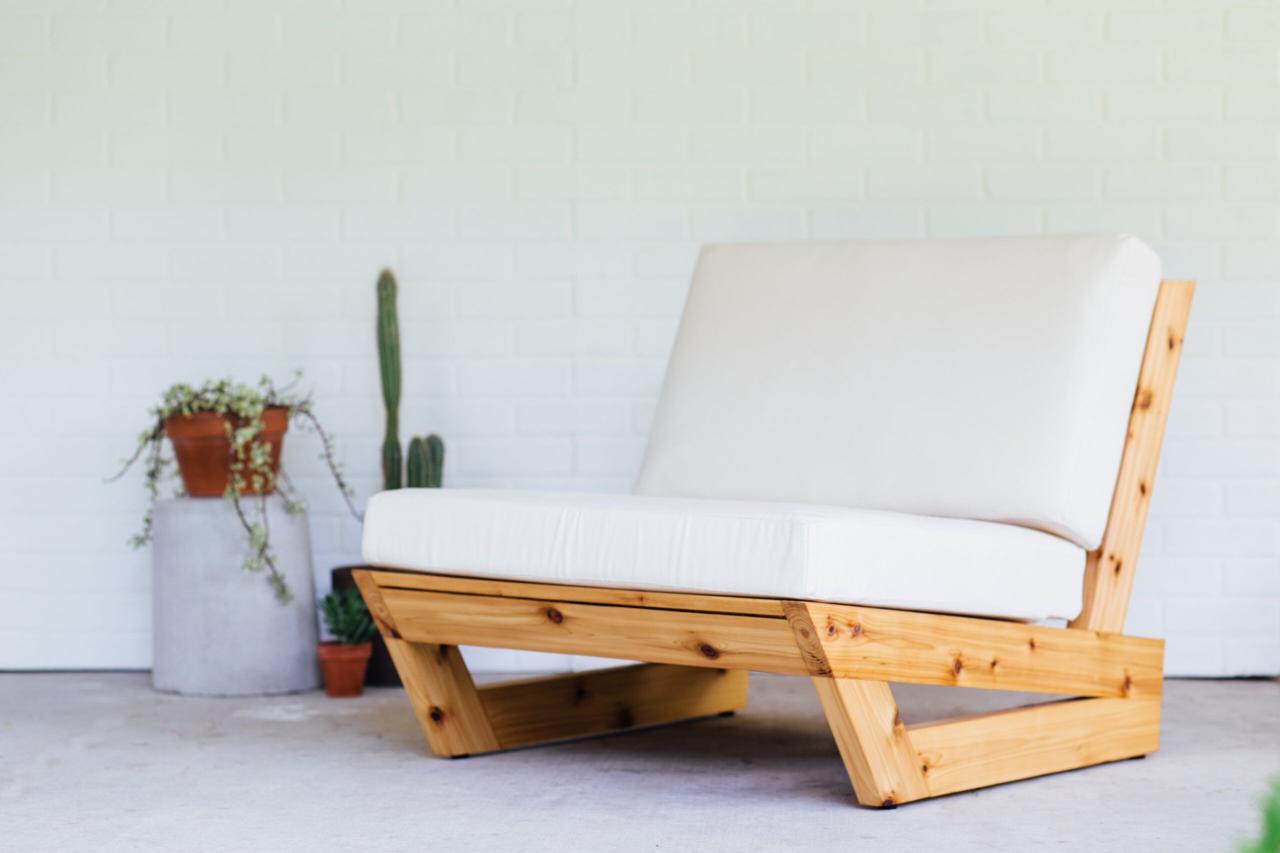
DIY furniture opens a world of stylistic possibilities. From rustic farmhouse tables crafted from reclaimed wood to sleek, minimalist designs using modern materials like plywood and metal, the only limit is your imagination. Mid-century modern styles can be replicated using simple joinery techniques and carefully selected fabrics. Industrial chic aesthetics are easily achievable with exposed metal pipes and repurposed wooden pallets. Even intricate, ornate styles can be tackled with careful planning and the right tools. The versatility of DIY allows for seamless integration of various styles, creating unique pieces that reflect personal taste.
A Successful DIY Furniture Project Narrative
Imagine transforming an old, discarded dresser into a stunning vanity. The dresser, found at a local flea market for a bargain price, was initially worn and outdated. After a thorough sanding and cleaning, it received a fresh coat of vibrant teal paint. New, brushed gold knobs replaced the old, tarnished ones. Finally, a mirrored top, custom-cut to size, was added, completing the transformation. The result was a beautiful, functional vanity, perfectly suited to the bedroom’s décor, and a testament to the power of creative repurposing. This project not only saved money but also breathed new life into a discarded item, showcasing the sustainable aspect of DIY furniture.
Essential Tools and Materials: Creative DIY Furniture
Embarking on a DIY furniture project requires careful consideration of the necessary tools and materials. The right equipment significantly impacts the quality, efficiency, and safety of your work. Choosing appropriate materials is equally crucial for the longevity and aesthetic appeal of your finished piece.
Selecting the correct tools and materials depends heavily on the type of furniture you’re building and the techniques involved. Woodworking projects demand different tools than upholstery projects, for instance. This section Artikels essential tools categorized by function, followed by a discussion of wood types and a table showcasing various materials and their applications.
Essential Tools for DIY Furniture Projects
Having the right tools readily available makes the entire process smoother and safer. The following tools are categorized for clarity, covering woodworking and basic upholstery tasks.
- Cutting Tools: A hand saw (for smaller cuts), a circular saw (for larger, more precise cuts), a jigsaw (for curved cuts), and a coping saw (for intricate detail work) are all invaluable. For woodworking, a sharp chisel is also necessary for precise shaping and joinery.
- Fastening Tools: A drill with various drill bits is essential for pilot holes and fastening. Screwdrivers (both Phillips and flathead), a hammer, and clamps are also crucial for securing pieces together. For upholstery, a staple gun is indispensable for attaching fabric to frames.
- Finishing Tools: Sandpaper (various grits for smoothing surfaces), brushes (for applying stains, paints, and sealants), and rags are essential for achieving a professional finish. A tack cloth helps remove dust before applying finishes. For upholstery, specialized tools for applying padding and fabric might be needed.
Wood Types for Furniture Making
The type of wood you choose significantly impacts the final product’s durability, appearance, and workability. Different woods possess unique properties, making some more suitable for specific projects than others.
Creative DIY furniture offers a fantastic way to personalize your living space. Achieving a tranquil atmosphere is key, and incorporating elements that promote a Zen home ambiance can significantly enhance the overall feel. By carefully selecting natural materials and simple designs for your handcrafted pieces, you can seamlessly blend your DIY creations with this calming aesthetic, resulting in a truly unique and relaxing home environment.
Hardwoods, such as oak, maple, and cherry, are known for their strength, durability, and beautiful grain patterns. They are more expensive but offer superior longevity. Softwoods, like pine and fir, are less expensive and easier to work with, but they are less durable and prone to dents and scratches. Plywood offers a cost-effective alternative, providing strength and stability while being relatively lightweight. The choice ultimately depends on the project’s demands and your budget.
Materials and Their Applications in DIY Furniture
A wide variety of materials beyond wood can enhance your DIY furniture projects. This table illustrates some common options and their typical uses.
| Material | Application | Pros | Cons |
|---|---|---|---|
| Wood (Hardwood/Softwood/Plywood) | Frames, legs, tops, shelves | Strength, durability, aesthetic appeal | Can be expensive (hardwoods), susceptible to damage |
| Metal (Steel, Iron) | Legs, frames, hardware | Strength, durability, modern aesthetic | Can be heavy, requires specialized tools |
| Fabric (Cotton, Linen, Velvet) | Upholstery, cushions | Comfort, aesthetic variety, ease of cleaning (some fabrics) | Can wear down, requires cleaning and maintenance |
| Foam | Cushions, padding | Comfort, support | Can compress over time |
Popular DIY Furniture Projects
Embarking on a DIY furniture project can be a rewarding experience, transforming basic materials into unique and stylish pieces for your home. This section details five simple yet impactful projects, perfect for beginners and seasoned DIY enthusiasts alike. Each project includes a detailed materials list, tool requirements, and a step-by-step guide, complete with visual descriptions to aid your creation.
Simple Floating Shelves
Creating floating shelves is a straightforward project that maximizes space and adds visual interest to any room. These shelves can be customized in size, shape, and finish to seamlessly integrate with your existing décor.
Materials: Wooden planks (pine or similar, cut to your desired dimensions), sturdy shelf brackets (ensure they are rated for the weight you intend to place on the shelves), screws, wall anchors (appropriate for your wall type), wood stain or paint (optional), sealant (optional).
Tools: Measuring tape, pencil, drill, screwdriver, level, sandpaper (optional).
Process: 1. Measure and mark the wall where you want to install the shelves. 2. Using a level, ensure the marks are perfectly horizontal. 3. Drill pilot holes at the marked locations for the shelf brackets. 4. Secure the brackets to the wall using screws and wall anchors. 5. Carefully position the wooden planks onto the brackets. 6. (Optional) Sand the shelves smooth, apply stain or paint, and seal for protection.
Visual Description: Imagine three sleek, horizontally aligned pine shelves mounted on a white wall. The shelves are stained a dark walnut, contrasting beautifully with the wall. The brackets are hidden, giving the illusion of the shelves floating. The shelves are evenly spaced, and the overall effect is clean and modern.
Adaptation: Vary the shelf lengths and depths to create an asymmetrical arrangement. Use different wood types or finishes for a more eclectic look. Incorporate decorative elements like metal brackets for a rustic or industrial feel.
Rustic Coffee Table
This project offers a charming, rustic aesthetic. It’s a great introduction to working with larger pieces of wood and involves minimal complex joinery.
Materials: Large, thick piece of reclaimed wood (or new wood with a distressed finish), four sturdy legs (wood or metal), wood glue, screws, wood filler (optional), sandpaper, wood stain or paint (optional), sealant (optional).
Tools: Measuring tape, saw (circular saw or hand saw), drill, screwdriver, clamps, sandpaper, level.
Process: 1. Cut the reclaimed wood to your desired dimensions for the tabletop. 2. Attach the legs to the underside of the tabletop using wood glue and screws. Ensure the legs are evenly spaced and level. 3. (Optional) Fill any holes or imperfections with wood filler, sand smooth, and apply stain or paint. 4. (Optional) Seal the tabletop for protection.
Visual Description: Picture a rectangular coffee table with a thick, weathered-looking wooden top. The wood shows natural variations in color and grain. Four simple, slightly tapered wooden legs support the tabletop. The overall look is rustic and inviting.
Adaptation: Use different leg styles (e.g., hairpin legs for a mid-century modern look). Incorporate a shelf underneath for extra storage. Experiment with different wood finishes to achieve a variety of aesthetics.
Simple Side Table
This compact side table is perfect for small spaces. Its design is straightforward, making it ideal for beginners.
Materials: Four small square or rectangular pieces of wood for the legs, one larger square or rectangular piece of wood for the tabletop, wood glue, screws, sandpaper, wood stain or paint (optional), sealant (optional).
Tools: Measuring tape, saw (circular saw or hand saw), drill, screwdriver, clamps, sandpaper.
Process: 1. Cut the wood to your desired dimensions. 2. Attach the legs to the corners of the tabletop using wood glue and screws. 3. (Optional) Sand the table smooth, apply stain or paint, and seal for protection.
Visual Description: Imagine a small, square side table with four straight legs. The tabletop is a light-colored wood, perhaps stained a natural oak. The legs are the same wood, providing a cohesive and simple design.
Adaptation: Use different wood types for the legs and tabletop to create contrast. Add a decorative inlay to the tabletop. Round the edges of the tabletop for a softer look.
Basic Bookshelf
This project offers ample storage and is a great way to showcase your favorite books and décor.
Materials: Wooden planks (for shelves and sides), screws, wood glue, wood stain or paint (optional), sealant (optional).
Tools: Measuring tape, saw (circular saw or hand saw), drill, screwdriver, clamps, sandpaper, level.
Process: 1. Cut the wood to your desired dimensions for the shelves and sides. 2. Assemble the sides, ensuring they are perfectly vertical and square. 3. Attach the shelves to the sides using wood glue and screws, ensuring they are evenly spaced and level. 4. (Optional) Sand the bookshelf smooth, apply stain or paint, and seal for protection.
Visual Description: A simple, three-shelf bookshelf stands against a wall. The shelves are evenly spaced and made of light-colored wood. The sides are slightly wider than the shelves, creating a clean, understated look.
Adaptation: Add decorative molding to the edges of the shelves. Create a leaning bookshelf instead of a freestanding one. Vary the shelf spacing to accommodate different sized books and objects.
Pallet Headboard
Transforming a reclaimed pallet into a headboard is a cost-effective and environmentally friendly project.
Materials: Reclaimed pallet (ensure it’s free of pests and treated wood), sandpaper, wood stain or paint (optional), sealant (optional), wall anchors and screws.
Tools: Hammer, screwdriver, saw (if needed to adjust pallet size), sandpaper, level.
Process: 1. Clean the pallet thoroughly. 2. Sand down any rough edges or splinters. 3. (Optional) Apply wood stain or paint to achieve your desired look. 4. (Optional) Seal the pallet for protection. 5. Secure the pallet to the wall above your bed using wall anchors and screws, ensuring it’s level and securely fastened.
Visual Description: A rustic, reclaimed pallet headboard hangs above a bed. The wood shows natural wear and tear, adding to its charm. The headboard is stained a dark brown, complementing the bed’s frame.
Adaptation: Add decorative elements like stencils or fabric to personalize the headboard. Use different types of pallets to create a unique look. Consider adding lights or other decorative elements.
Advanced Techniques and Finishes
Taking your DIY furniture projects to the next level involves mastering advanced woodworking techniques and applying professional-quality finishes. This section explores key methods to enhance both the structural integrity and aesthetic appeal of your creations. Proper joinery and finishing are crucial for creating durable and visually stunning pieces.
Advanced Woodworking Techniques
This section details essential joinery methods and wood shaping techniques for building robust and aesthetically pleasing furniture. Strong joints are the backbone of any successful project, ensuring longevity and stability. Careful shaping enhances both the look and functionality of the finished piece.
- Mortise and Tenon Joints: These joints, characterized by a projecting tenon (the “peg”) fitting precisely into a mortise (the “hole”), are incredibly strong and offer a clean, traditional look. They are ideal for chair legs, table legs, and other structural elements. Variations include through tenons, blind tenons, and wedged tenons, each offering different levels of strength and visibility.
- Dovetail Joints: Known for their exceptional strength and intricate appearance, dovetail joints are often used in drawers and boxes. The interlocking “tails” and “pins” create a joint that resists pulling forces remarkably well. Through dovetails are visible on both sides, while half-blind dovetails show only on one side, offering a cleaner aesthetic.
- Wood Shaping Techniques: Techniques like planing, chiseling, and using router jigs allow for precise shaping of wood components. These skills are essential for creating curved legs, decorative moldings, and custom profiles that add character and personality to your furniture.
Finishing Techniques
Choosing the right finish significantly impacts the durability and visual appeal of your furniture. This section compares several popular methods, highlighting their respective advantages and disadvantages.
- Painting: Painting offers a wide array of colors and finishes, from matte to high-gloss. It provides excellent protection against moisture and scratches, and it’s relatively easy to apply. However, it can obscure the natural wood grain.
- Staining: Staining enhances the natural beauty of the wood grain by penetrating the surface and altering its color. It offers a more natural look compared to paint, but it provides less protection against wear and tear. Various stains, including oil-based and water-based options, are available, each offering unique characteristics.
- Varnishing: Varnish creates a protective layer over the wood, enhancing its durability and resistance to moisture and scratches. It is available in various sheens, from satin to high-gloss. Clear varnish allows the natural wood grain to show through, while tinted varnish can add subtle color.
Durability and Aesthetic Qualities of Finishes
The choice of finish depends heavily on the intended use and desired aesthetic. A high-gloss varnish might be suitable for a formal dining table, offering superior protection, while a matte stain might be preferable for a rustic coffee table, showcasing the wood’s natural character. Oil-based finishes generally offer superior durability but require more careful application and longer drying times than water-based options.
Selecting Appropriate Hardware
The right hardware can significantly enhance both the functionality and aesthetics of your DIY furniture. Careful consideration of material, style, and durability is crucial for a professional-looking finish.
- Hinges: Choose hinges appropriate for the weight and type of door or lid. For heavier doors, consider using full overlay hinges for better support. Different hinge styles (e.g., butt hinges, concealed hinges) offer varied aesthetic appeal.
- Handles and Knobs: The style of handles and knobs should complement the overall design of the furniture. Consider factors such as material (wood, metal, ceramic), size, and finish when making your selection. Ergonomics should also be a factor, ensuring comfortable and easy operation.
- Slides (for drawers): High-quality drawer slides are essential for smooth and reliable operation. Full-extension slides allow for complete access to the contents of the drawer, while undermount slides offer a cleaner aesthetic.
Upcycling and Repurposing
Upcycling and repurposing materials are key components of sustainable and creative DIY furniture making. Transforming discarded or unwanted items into functional and aesthetically pleasing pieces not only reduces waste but also allows for the creation of truly unique furniture with a distinct character. This section explores various materials suitable for upcycling, provides examples of successful projects, and details the process of revitalizing an old piece of furniture.
Repurposing materials offers a wealth of possibilities for crafting unique furniture. Many everyday items, often destined for landfills, can be given new life through careful planning and creative execution. This approach allows for both cost savings and a reduction in environmental impact.
Suitable Materials for Upcycling
Numerous materials lend themselves well to upcycling projects. Reclaimed wood, with its inherent variations in color and texture, offers a rustic charm. Pallets, readily available and often free, provide a sturdy base for various furniture designs. Old doors, windows, and even metal components from discarded appliances can be incorporated into unique pieces. Other possibilities include vintage suitcases, ladders, and even old barrels. The possibilities are limited only by imagination and ingenuity.
Examples of Upcycled Furniture
A reclaimed wood coffee table, crafted from salvaged planks, can showcase the natural beauty of the wood grain. Each piece will be unique due to the wood’s varied character. A pallet headboard, stained and varnished, offers a rustic and stylish addition to a bedroom. Old industrial metal shelving units can be repurposed into a striking and modern bookshelf, adding an industrial aesthetic to a room. Even old window frames can be cleverly incorporated into a mirror frame or a unique wall-mounted shelf.
Steps Involved in Upcycling an Old Piece of Furniture
The process of upcycling typically involves several key steps. First, a thorough assessment of the existing piece is crucial, identifying areas needing repair or replacement. This might involve cleaning, sanding, and addressing any structural issues. Next, a design plan is developed, considering the desired final aesthetic and functionality. This stage involves choosing finishes, fabrics, or additional materials. The actual transformation then takes place, involving painting, staining, reupholstering, or adding new components. Finally, a protective finish is applied to preserve the upcycled piece and enhance its longevity.
Example of an Upcycled Furniture Project
Imagine an old, worn wooden dresser. Its drawers are slightly misaligned, and the finish is chipped and faded. The upcycling process begins with a thorough cleaning and sanding of the entire piece, revealing the natural wood grain underneath. The misaligned drawers are carefully repaired and reinforced. The dresser is then painted with a vibrant teal paint, chosen for its modern appeal. New, brushed brass knobs are installed, adding a touch of elegance. Finally, a coat of clear varnish protects the new paint job and enhances the wood’s natural sheen. The result is a completely transformed dresser, blending rustic charm with modern style, a unique piece that stands apart from mass-produced furniture.
Safety Precautions and Best Practices
DIY furniture projects offer immense satisfaction, but safety should always be the top priority. Ignoring safety precautions can lead to serious injuries, from minor cuts to severe eye damage or even broken bones. This section Artikels essential safety measures to ensure a safe and enjoyable crafting experience.
Working with woodworking tools and potentially hazardous materials requires careful attention to detail and adherence to established safety protocols. Proper planning, tool maintenance, and understanding material properties are crucial to minimizing risks. Always prioritize safety over speed; rushing increases the likelihood of accidents.
Essential Safety Precautions When Using Woodworking Tools, Creative DIY furniture
Woodworking tools, while capable of creating beautiful pieces, pose inherent risks if mishandled. The following precautions are essential to mitigate these risks and protect yourself from injury.
- Always wear appropriate safety glasses or a face shield to protect your eyes from flying debris.
- Use hearing protection when operating loud machinery like saws or routers. Prolonged exposure to loud noises can cause permanent hearing damage.
- Ensure proper ventilation when using power tools, especially those that produce dust or fumes. A well-ventilated workspace minimizes the risk of inhaling harmful particles.
- Keep your workspace clean and organized. Clutter can lead to accidents and trips. A clean workspace allows for better focus and safer work practices.
- Never operate machinery while tired or under the influence of drugs or alcohol. Fatigue impairs judgment and reaction time, increasing the risk of accidents.
- Always disconnect power tools from the power source before making adjustments or cleaning them. This prevents accidental starts and injuries.
- Use push sticks or feather boards when working with power tools to keep your hands away from the cutting blades. These simple tools significantly reduce the risk of hand injuries.
- Maintain your tools regularly. Dull blades require more force, increasing the risk of kickback and injury. Regular sharpening and maintenance ensure tools function as intended.
Proper Handling of Hazardous Materials
Many DIY projects involve the use of paints, stains, varnishes, and other potentially hazardous materials. Safe handling of these materials is crucial to protect your health and the environment.
- Always read and follow the manufacturer’s instructions on the labels of all hazardous materials. These instructions provide vital information on safe handling, storage, and disposal.
- Work in a well-ventilated area when using paints, stains, or other materials that release fumes. Open windows and use fans to ensure proper air circulation.
- Wear appropriate personal protective equipment (PPE), such as gloves, respirators, and eye protection, when handling hazardous materials. The type of PPE required will vary depending on the specific material.
- Store hazardous materials in a safe, secure location, away from children and pets. Proper storage prevents accidental spills or ingestion.
- Dispose of hazardous materials properly according to local regulations. Never pour paints or other chemicals down the drain or into the trash. Check with your local waste management facility for proper disposal methods.
Safety Checklist for DIY Furniture Projects
A comprehensive checklist helps ensure that all necessary safety measures are followed throughout the project.
Creative DIY furniture offers a fantastic avenue for personal expression in your home. Building your own pieces allows for unique designs perfectly tailored to your space, and this aligns beautifully with the principles of Eclectic home decor , which celebrates individuality and a curated mix of styles. Ultimately, crafting your own furniture is a rewarding way to achieve a truly distinctive and eclectic aesthetic.
| Project Stage | Safety Measures |
|---|---|
| Planning & Design | Accurately measure and plan cuts to avoid mistakes. Review safety precautions for all tools and materials to be used. |
| Material Preparation | Wear appropriate safety glasses and gloves when handling wood and other materials. Ensure adequate ventilation. |
| Cutting & Shaping | Use appropriate safety guards on power tools. Use push sticks or feather boards. Wear hearing protection. |
| Assembly | Use clamps securely to prevent injuries from shifting materials. Wear work gloves. |
| Finishing | Work in a well-ventilated area when using paints, stains, or other finishes. Wear appropriate PPE, including respirators and gloves. |
| Cleanup | Dispose of hazardous materials properly. Clean up sawdust and debris thoroughly. |
Importance of Planning and Accurate Measuring
Careful planning and accurate measuring are paramount to preventing mistakes and ensuring a safe project. Errors in measurement can lead to unsafe situations, such as unstable structures or improperly fitted components. They can also lead to wasted materials and time.
Before starting any project, create detailed plans, including precise measurements and cut lists. Double-check all measurements to minimize errors. Using a measuring tape, square, and level will improve accuracy. Consider creating a full-scale mockup to identify potential problems before cutting expensive materials. This proactive approach significantly reduces the risk of accidents and ensures a successful outcome.
Inspiration and Resources
Finding inspiration and accessing reliable resources are crucial for successful DIY furniture projects. The sheer variety of styles, materials, and techniques available can be both exciting and overwhelming. This section will explore diverse sources of inspiration and provide a curated list of helpful online resources to guide your creative journey. Successfully navigating these resources will empower you to design and build furniture that reflects your personal style and skill level.
Inspiring DIY Furniture Designs
Numerous sources offer inspiration for DIY furniture projects. One example is a mid-century modern-inspired coffee table constructed from reclaimed wood planks and hairpin legs. The wood’s natural grain is left visible, showcasing its unique character, and the sleek hairpin legs provide a contemporary contrast. Another striking design is a rustic farmhouse-style dining table made from repurposed barn wood. The table’s thick, weathered planks possess a rich history, and its simple, sturdy construction emphasizes functionality and natural beauty. Finally, a minimalist floating shelf unit crafted from sleek white melamine offers a clean, contemporary aesthetic. Its simple design allows it to blend seamlessly into a variety of interior styles, showcasing the potential of simple materials and clean lines. These examples illustrate the broad spectrum of possibilities within DIY furniture making.
Reputable Online Resources for DIY Furniture Plans and Tutorials
Accessing reliable plans and tutorials is vital for successful DIY projects. The internet offers a wealth of resources, but careful selection is key. A range of websites and platforms provide detailed plans, step-by-step instructions, and video tutorials catering to various skill levels and project types.
Categorized Resources for DIY Furniture Projects
The following categories offer a structured approach to finding suitable resources:
- Beginner-Friendly Projects (Simple Shelves, Small Tables): Websites focusing on beginner-level DIY often feature projects with clear instructions, readily available materials, and simple techniques. These sites prioritize easy-to-follow guides and often include detailed visual aids.
- Intermediate Projects (Chairs, Benches, Headboards): Resources targeting intermediate skill levels introduce more complex joinery techniques and potentially more challenging material choices. These might include plans that involve using more specialized tools or working with harder woods.
- Advanced Projects (Custom Cabinets, Built-in Furniture): Advanced resources cater to experienced DIYers, often involving custom designs, complex joinery, and specialized finishes. These resources often assume a level of familiarity with woodworking techniques and tools.
- Specific Furniture Types (Beds, Desks, Tables): Many websites and platforms specialize in specific furniture types, offering a wealth of plans and tutorials for each. This allows users to quickly find resources relevant to their desired project.
- Material-Specific Resources (Wood, Metal, Pallet): Some resources concentrate on specific materials, offering expertise in working with wood, metal, or repurposed materials like pallets. This targeted approach can be highly beneficial for those working with a specific material preference.
- Style-Specific Resources (Mid-Century Modern, Rustic, Industrial): Many online resources are curated by style, providing a focused selection of plans and tutorials for those seeking a particular aesthetic. This helps maintain stylistic cohesion in a home’s decor.
Importance of Seeking Diverse Inspiration and Adapting to Personal Style
Drawing inspiration from multiple sources is essential for developing a unique and personal style. By exploring various designs, materials, and techniques, you can identify elements that resonate with your aesthetic preferences and adapt them to create something truly original. Avoid simply copying designs; instead, use them as springboards for your own creativity, incorporating your personal touches and adapting them to your space and needs. This iterative process of exploration and adaptation is key to creating truly personalized DIY furniture.
Wrap-Up
Creating your own furniture is more than just a hobby; it’s a journey of self-discovery and artistic expression. This guide has equipped you with the knowledge and inspiration to tackle various DIY projects, from simple to complex. Remember to prioritize safety, plan meticulously, and embrace the creative process. With patience, perseverance, and a dash of ingenuity, you can transform your vision into tangible reality, crafting furniture that reflects your unique style and adds character to your living spaces. The satisfaction of building something beautiful and functional with your own hands is an unparalleled reward.